
 A detailed user guide for my Active Directory reporting tool
- AD Info
A detailed user guide for my Active Directory reporting tool
- AD Info
Whilst I have aimed to make AD Info as user friendly and straight forward to use as possible, I am sure a detailed
guide/reference will still be useful.
So this page will explain each of the terms used in AD Info, walk
you through how to use every part of the application, and also provide some useful tips to help
you get the best performance and results from it.
Guide Contents
 Domain Settings
Query Files
Running A Query
Exporting Results
Creating A New Query
Domain Settings
The Domain Settings window allows you to specify the name of the domain you want to run queries against as well as the credentials that you want to use to execute the queries.
It also allows you to select which domain controllers will be queried to determine the real value of non-replicated attributes such as the Last Logon Date attribute.
Note that you do not need to change the domain
controllers setting unless you know you will be working
with non-replicated attributes - you can see which
attributes are not replicated in the full attribute
guide here. To decide
which DC to use for any replicated attributes (the vast majority of attributes in AD Info are replicated attributes) AD Info
uses standard Windows functions that locate a suitable DC,
so this will usually be a DC on the same site as you or
close to you. So if you are only querying replicated
attributes, the selections made in the Domain
Controllers setting in this window will not have any
effect.
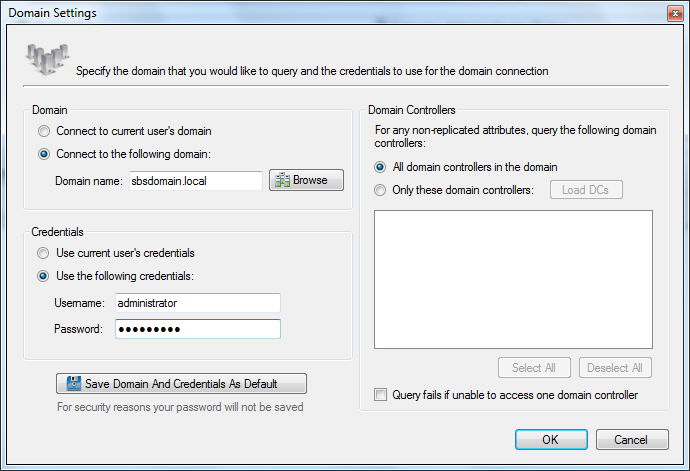
It is recommended that you use the default setting of using all domain controllers in the domain, as otherwise you could get innacurate results for non-replicated attributes.
If you know that certain domain controllers are not accessible then you can click the Load DCs button and then deselect them from the list.
Alternatively you can uncheck the "Query fails if unable to access one domain controller" setting, as this will mean that a query will not fail and stop if it is unable to get a non-replicated attribute from at least one domain controller.
If you will always be targetting a domain that is not the domain your user account is held in then you can enter the domain name and then use the "Save Domain And Credentials As Default" button to make AD Info target this domain by default.
If you specify an alternate user account to use for the domain connection then you will be prompted to enter the password for this account
when you launch the application. To clear these saved
settings, just set the options back to "Connect to
current user's domain" and "Use current user's
credentials" and then click the save credentials button
again.
Query Files
Each query in AD Info is stored in its own XML file - this applies to all of the predefined queries as well as any custom queries you create (custom queries can not be created in the Free Edition).
These XML files specify all settings for the query, such as its name, icon, the type of objects it finds (users, groups, etc), the date it was created, the parameters that determine which objects this query will find, and also the version of AD Info that the query was created with.
It is recommended that you do not ever manually edit the XML files and instead use the AD Info application to create, edit, and delete query files.
When AD Info launches, it searches all Query File Locations (which can be specified in the Tools - Options window) for XML files and attempts to parse these as query definitions.
For this reason it is important not to specify any Query File Locations that contain XML files which are not AD Info query definitions, as you will receive a warning when launching the application explaining that the file(s) contain invalid query settings.
You can see where the XML file for a particular query is located by right clicking on the query and then clicking Properties.
The "Location" field shows where this query file is
stored:
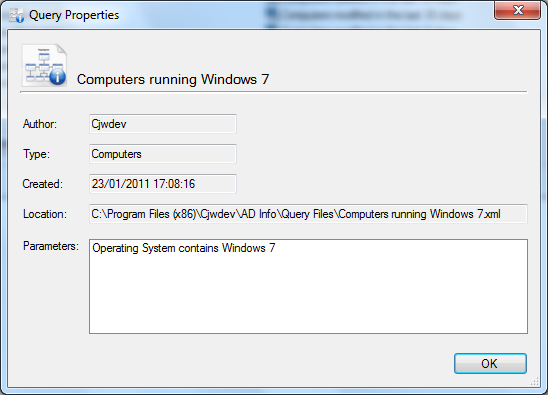
By default any new queries that you create will be saved to the following location: %AppData%\Cjwdev\ADInfo\Query Files , however this default location can be changed in the Tools - Options window.
You can also manually specify the location that you would like the XML file to be saved to when you create a query, by entering the desired path into the "Save To" box in the New Query window.
If your colleages are also using AD Info then you may wish to all set your default query file location to a shared network location so that any new custom queries one of you creates will be available for others to use next time they launch the application. To make it easier to share settings like this, the default query file location along with several other settings can be set via Group Policy - see here for more information.
Running A Query
Once you have selected the domain that you wish to target your queries at (or used the default setting of targetting the current user's domain), you can run any available query by clicking on it in the query list and then clicking the "Run Selected Query" button.
Alternatively you can right click on a query and select Run or simply double click the query. Queries are grouped into separate tabs based on the type of objects that they will find - i.e all queries that return user accounts are grouped together in the Users tab.
Query Parameters
As well as being set to only find a specific type of object (groups, users, GPOs, etc), each query has a list of parameters that determine which objects that query will find. Each parameter consists of the following: An attribute, an operator, and a value.
An example of a parameter for a computer based query could be: "Disabled is True" and this would obviously only return computer accounts that are disabled. In this example the attribute is the "Disabled" attribute, the operator is the "is" operator (aka equals) and the value is "True". Another example could be: "Primary Group is not Domain Computers" and this would only find computers that are not using the Domain Computers group as their primary group. Here the attribute is the "Primary Group" attribute, the operator is the "is not" operator (aka not equal to), and the value is the Domain Computers group.
Most of the predefined queries only use one or two parameters but any number of parameters can be used, though it is important to note that in the current version of AD Info if a query has multiple parameters then all parameters must be matched for an object to be returned by that query, so if you had two parameters then an object would have to match both for it to be returned, if it only matched one parameter then it would not be included in the query results.
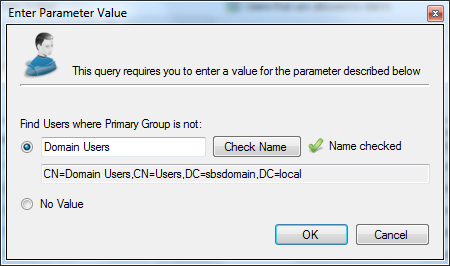
As mentioned above, each parameter must have a value (the value that the specified attribute must have for that object to be found by the query) but this value does not have to be 'hard coded' into the query, instead it can be set to be a "User Specified Value". What this means is that when someone runs the query they will be prompted to enter the value for this attribute 'on the fly'.
This behaviour can be seen in many of the predefined queries, for example if you run the user query named "Users not using specified group as primary group" then you will see that you are asked to enter the name of the group that you wish to use (so only users not using this group as their primary group will be returned by the query), as shown in the image below:
Attribute Selection
Once you have entered any required values for query parameters (or if none of the query parameters use User Specified Values), you will be asked to select the attributes that you wish to include in the query output - that is, any attributes you select will be gathered from any objects that match the query parameters and will be displayed in the results.
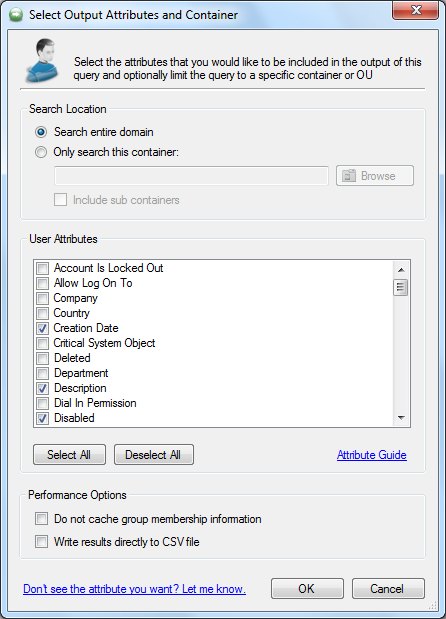
Whilst you can use the Select All button to select all attributes, it is recommended that you only include attributes that you are actually interested in as otherwise the length of time that it takes for the query to execute could be dramatically increased. If you select any non-replicated attributes for example then the query will take much longer as it will have to query each domain controller in the domain instead of just querying a single domain controller (see here for a list of all attributes and whether or not they are replicated).
From this window you can also limit the query to only returning objects that are in a specific container or OU
or search the entire domain (which is usually the desired behaviour).
Performance Options
Within the
attribute selection window mentioned above, there are also two performance related settings:
"Do not cache group membership information" and "Write
results directly to CSV file" - these should only be used if you are working with domains that have extremely large numbers of objects in them (hundreds of thousands of user accounts for example). Even if you are working with large numbes of objects, you should only enable these options if you are experiencing Out Of Memory errors when running queries without these options enabled.
Disabling group membership information caching can make
AD Info use significantly less memory when running
queries that need to query large numbers of groups but
will also make such queries take much longer. If you are
experiencing memory issues and are either not working
with group membership attributes at all or are still
having problems even with group membership caching
disabled then you can use the option to write directly
to CSV file. Enabling this option means that any objects
that match your query parameters will be written to the
specified CSV file as soon as they are found, instead of
being stored in memory and then shown in the results
grid. As such, the results in the CSV file will not be
sorted in any kind of order but can easily be sorted when the CSV file has been opened in Microsoft Excel.
Running The Query
Once you have selected the attributes you would like to see for each object that matches the query parameters and clicked the OK button, the query will run and you will see a summary of its progress as shown in the image below:
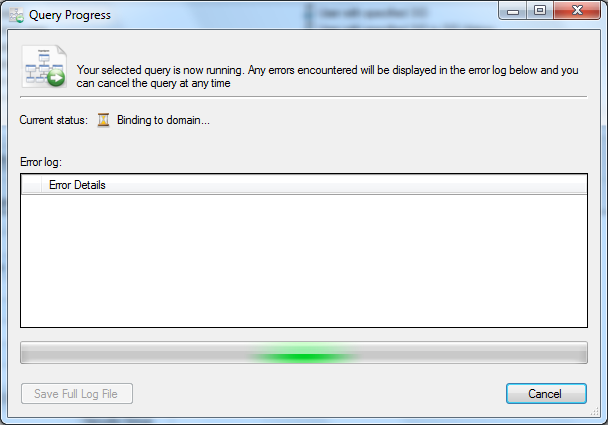
Once the query has finished, you can review any errors reported in the error log within the query progress window and then close the window to see the query results.
If you cancelled the query then no results will be shown even if some results had already been found prior to cancellation.
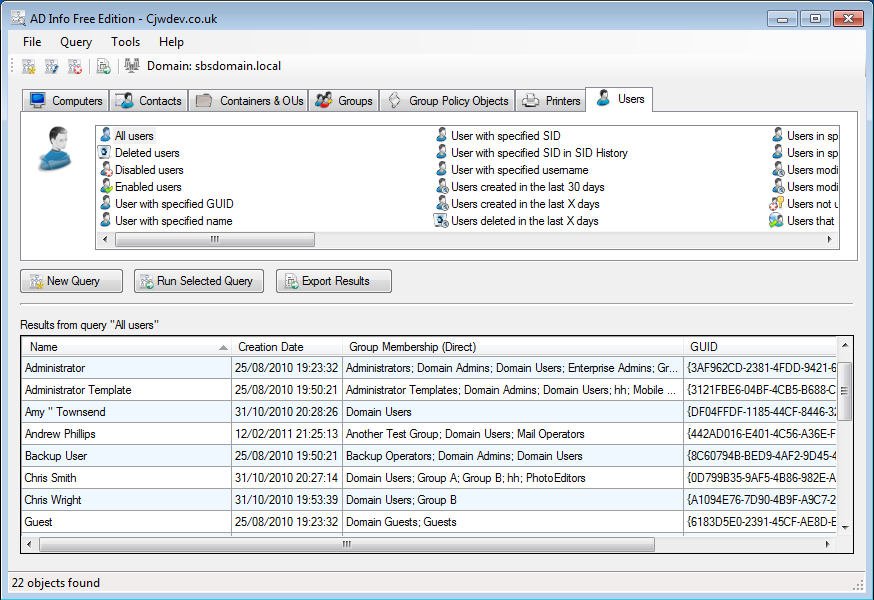
The results of your query will
now be displayed on the main window as shown in the imag
above, with a column being added to the grid for each of the attributes that you selected when you ran the query. Each column can be sorted in ascending or descending order
by clicking on the column header and you can change the column order by dragging the column header to the location you want it to be in. Right clicking on an individual
cell will give you the option to copy the contents of that cell,
but if you would like to get the full query results out
of AD Info then you can use the Export Results function,
which is described below.
Exporting Results
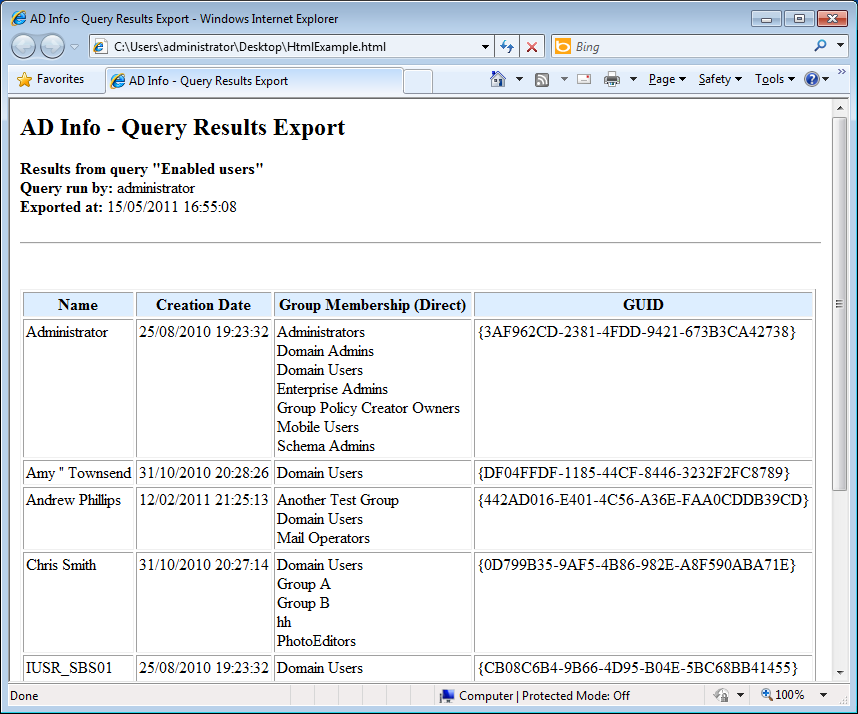
After you have executed a query that returned at least one result, you can export the results to TXT, CSV, or HTML file (only CSV format is available in the free edition of AD Info).
To do this, click the Export Results button above the results grid or in the toolbar at the top of the window and then select the file format you would like to export to.
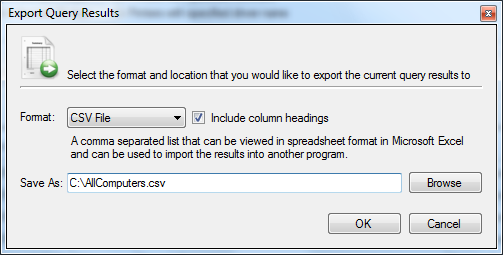
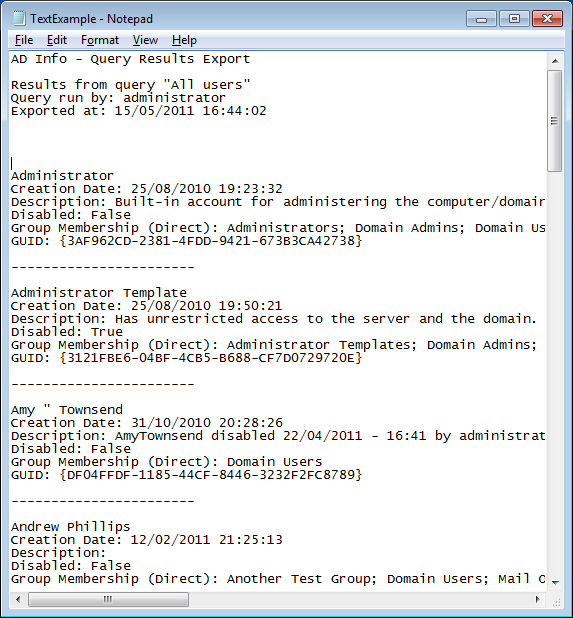
Note that each file format provides a different layout, examples of each format can be seen below.
Text File
CSV File (Opened in Microsoft Excel 2010)

HTML File
Creating A New Query
More information coming soon